The Text tool allows you to add notes, comments, or reminders directly to any part of a plan drawing. You can fully customize your annotations by adjusting the color, font size, and text style (such as bold or italics).
Depending on your needs, you can add text in one of two ways:
1. Single-line text: Click to place a note where the text box width automatically expands to fit the length of your text. Best for quick labels, short callouts, or measurements.
2 Fixed-width text box: Draw a boundary of a specific size so that your text automatically wraps to fit inside the box. Best for multi-sentence instructions, material lists, or fitting a note into a confined visual space on a crowded blueprint.
Use the links below to jump to the section you need help with:
Add a Single-Line Text Note
- Select the Text tool from the toolbar.
- Click the spot on the plan where you want to place the note.
- Type your text into the box.
- Use the formatting options at the top to select your desired font size, text style (bold/italics), and color.
- Click anywhere outside the box to save your text.
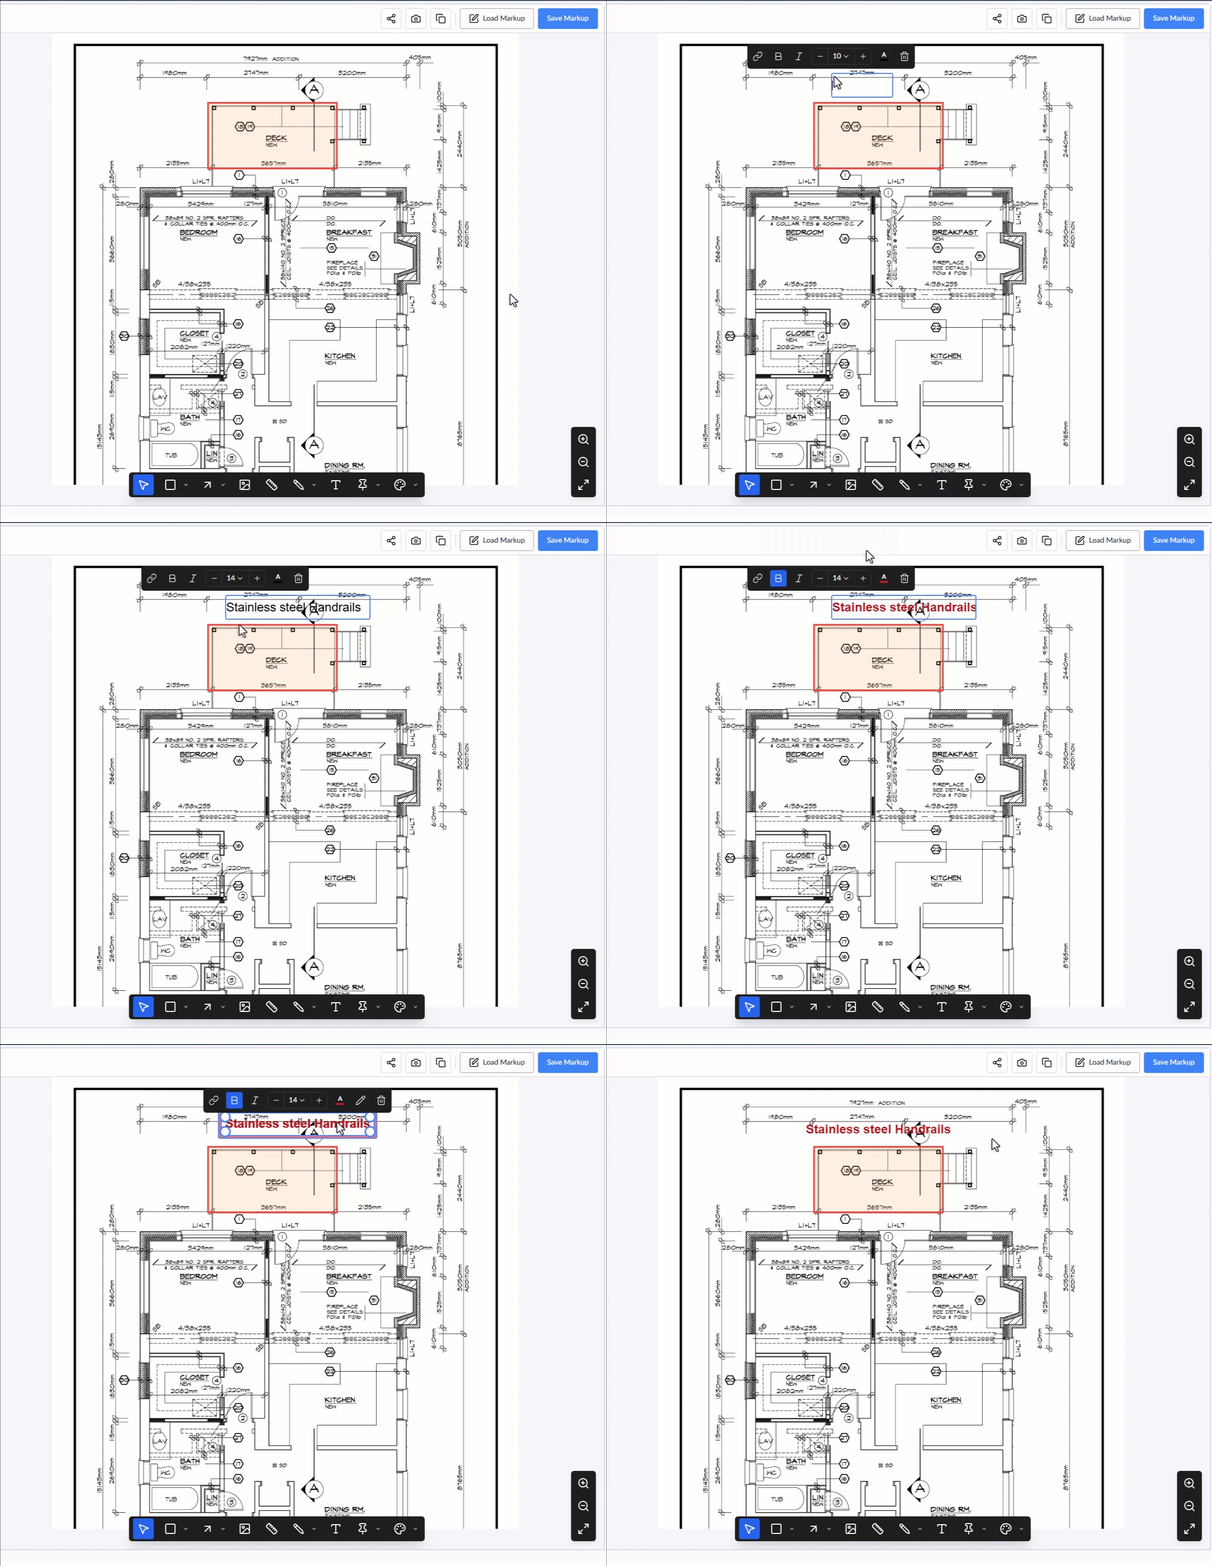
Adjust Your Text Box:
- Move: Click and drag the text box to reposition it exactly where you want it on the plan.
- Resize: Click the text box to select it, then click and drag the handles at the corners to adjust its size.
Once added, your text markup is saved as a layer. See Clone and Organize the Markups below to learn how to manage it.
Draw a Fixed-Width Text Box
- Select the Text tool from the toolbar.
- Click the spot on the plan where you want to place the note and drag it diagonally to define the exact width and height of your text box.
- Type your text into the box.
- Use the formatting options at the top to select your desired font size, text style (bold/italics), and color.
- Click anywhere outside the box to save your text.
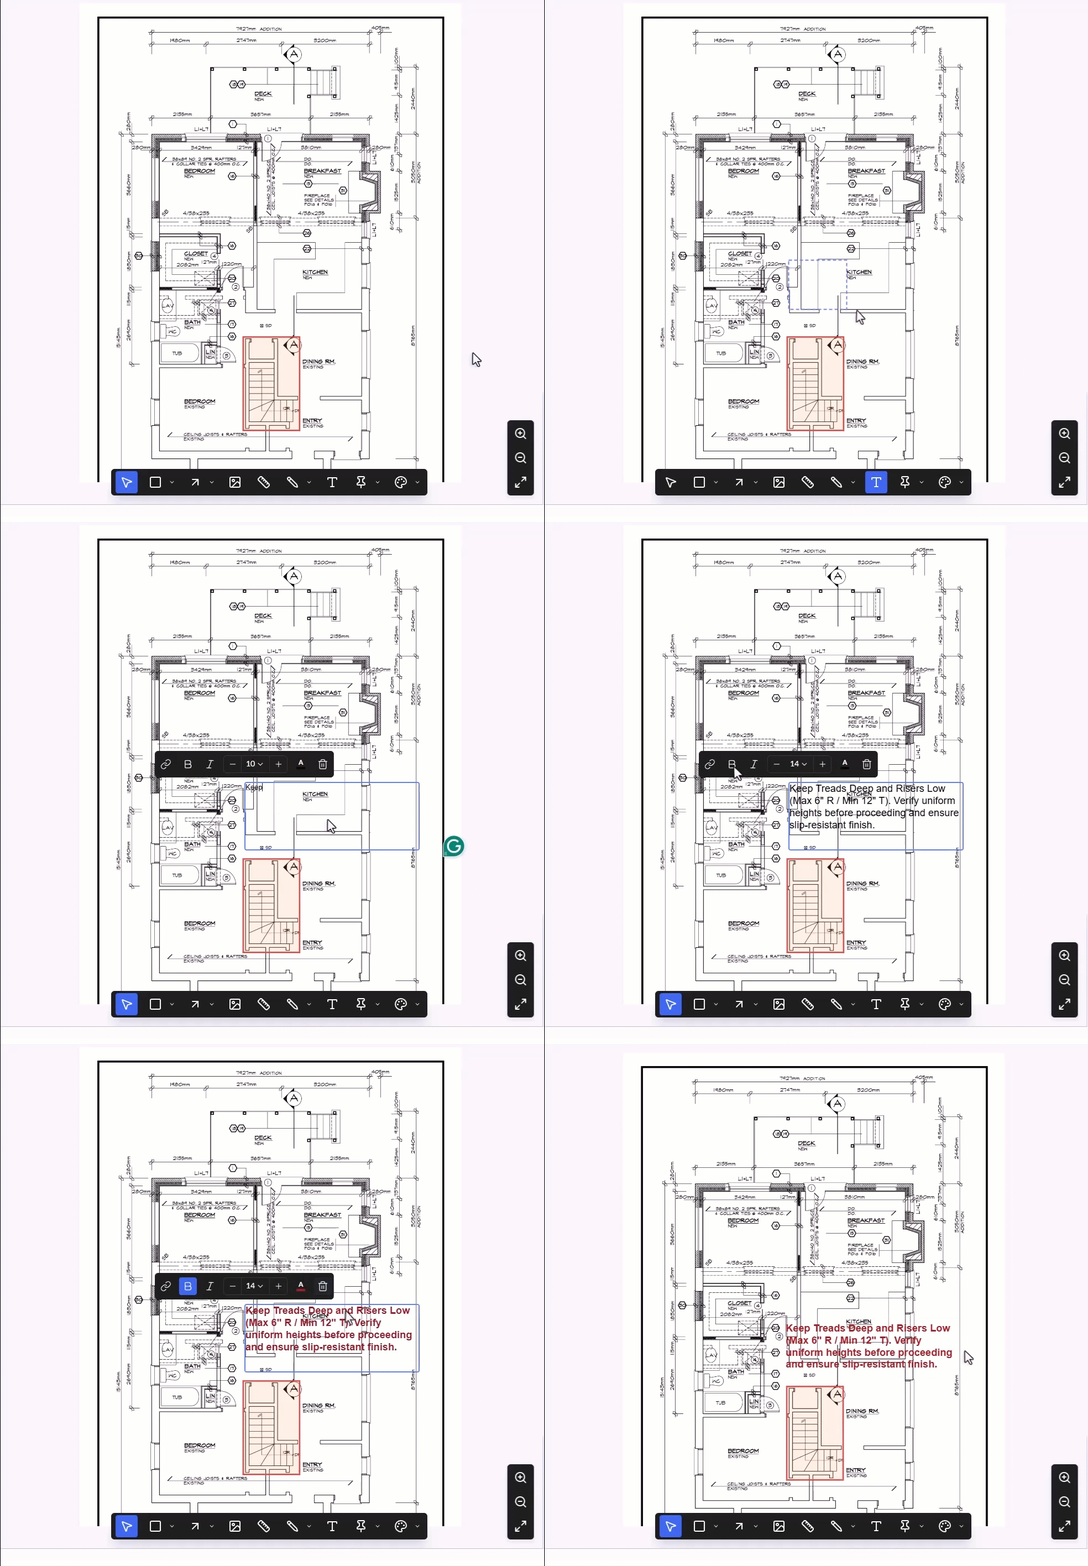
Adjust Your Text Box:
- Move: Click and drag the text box to reposition it exactly where you want it on the plan.
- Resize: Click the text box to select it, then click and drag the handles at the corners to adjust its size.
Clone and Organize the Markups
Clone a Markup
If you need to mark a similar area elsewhere on the drawing, you can duplicate your text box rather than creating a new one from scratch. See Clone and Reuse Markups for detailed guidance.
Manage Layers
Every text box you add is automatically saved as a new layer within the Current Markup group, which is visible in the layer editor on the left side of your screen. From this editor, you can manage your markups:
- Rename: Click the element's label in the editor to give it a brief, descriptive name to keep your markups organized.
- Lock: Hover over the element and click the
 icon to prevent accidental edits or deletion.
 - Hide/Show: Hover over the element and click the
 icon to temporarily hide or show the layer on your plan.
 - Delete: Hover over the element and click the
 icon to remove a mistake.
You can continue selecting tools to add more markup elements as needed. Once you are finished annotating the plan, you must save the layer group. See Publish Markups for detailed instructions on finalizing your work.
Was this article helpful?
That’s Great!
Thank you for your feedback
Sorry! We couldn't be helpful
Thank you for your feedback
Feedback sent
We appreciate your effort and will try to fix the article