The Pencil and Brush tools allow you to draw freehand markups directly onto your plan drawings.
- Sketching notes: Quickly jot down ideas or feedback.
- Highlighting irregular areas: Mark complex spaces that standard shapes cannot easily cover.
- Adding visual cues: Draw arrows or circles to draw immediate attention to specific details on the sheet.
You can easily adjust the color, transparency, and overall appearance of your markups to ensure they stand out perfectly against the background.
To create a freehand markup
- Click the drop-down beside the pencil/Brush tool in the tool bar and choose the pencil or brush as required.
- Draw your freehand markup on the plan drawing.
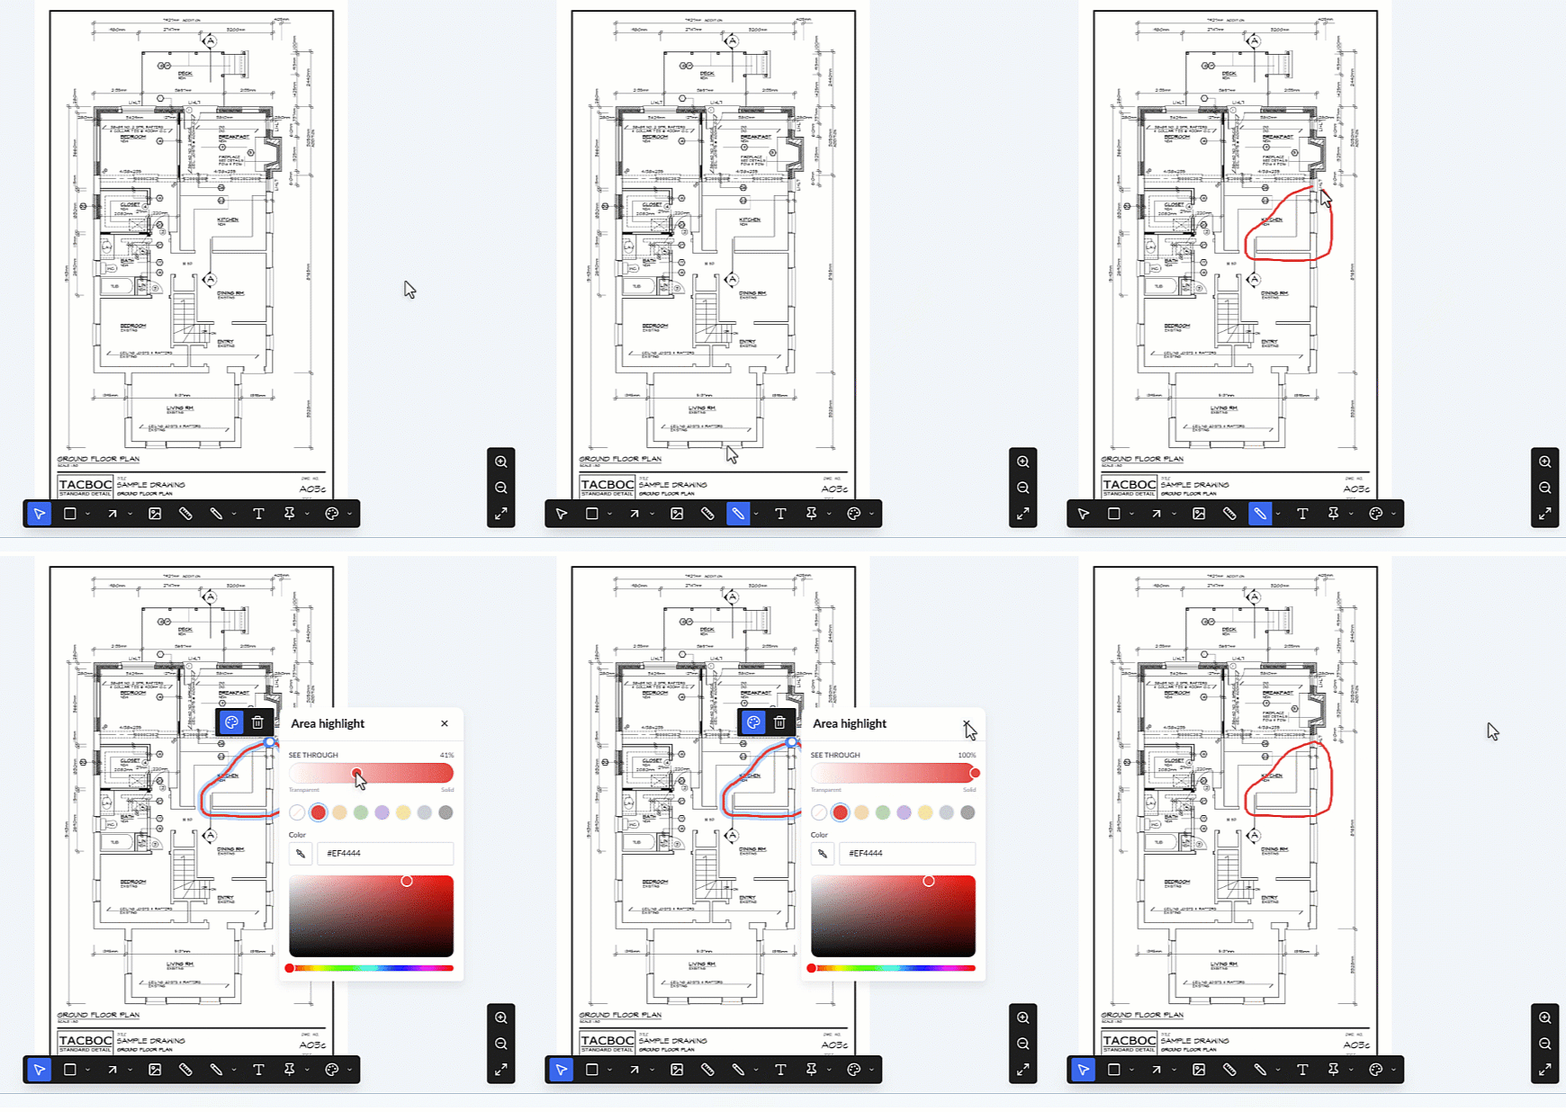
- Click on the markup to select it and drag it to the precise location you want to markup, if required.
The markup is added with the default red color.
Customize the Markup
- Click the color palette icon above to the markup or in the toolbar at the bottom to adjust the stroke color and its transparencyor add a color fill. See Format Stroke and Fill Colors for guidance.
You can also clone the markup to mark similar area on a different spot in the drawing. See Clone and Reuse Markups if you need guidance on it.
Every shape you add is automatically saved as a new layer within the "Current Markup" group, which is visible in the layer editor on the left side of your screen. From this editor, you can manage your shapes:
- Rename: Click the element's label in the editor to give it a brief, descriptive name to keep your markups organized.
- Lock: Hover over the element and click the
 icon to prevent accidental edits or deletion.
 - Hide/Show: Hover over the element and click the
 icon to temporarily hide or show the layer on your plan.
 - Delete: Hover over the element and click the
 icon to remove a mistake.
You can continue selecting tools to add more markup elements as needed. Once you are finished annotating the plan, you must save the layer group. See Publish Markups for detailed instructions on finalizing your work.
Was this article helpful?
That’s Great!
Thank you for your feedback
Sorry! We couldn't be helpful
Thank you for your feedback
Feedback sent
We appreciate your effort and will try to fix the article