Linarc provides the project managers with an activity log to get a centralized view of all workflow activities across the project. It helps you track progress, monitor milestone completion, and identify delays or bottlenecks before they escalate. By reviewing the Activity Log, you can ensure accountability, maintain transparency, and make timely adjustments to keep the project on schedule. You can,
Review detailed activity histories for workflow items such as RFIs, Submittals, Punch Lists, and Change Orders.
Monitor updates to project schedules, including progress changes and milestone adjustments.
Track budget-related activities to keep costs aligned with project goals.
Quickly identify and resolve issues that could impact timelines or deliverables.
Improve collaboration and communication by maintaining a clear record of project activities.
To open the activity log screen
- Ensure you are in the 'Activity log' screen. If not
- Hover your mouse over the main menu at the top-left
- Click 'Information' under 'Project' menu
- Hover your mouse over ' Activity ' on the left menu and choose ' Activity Log'
By default, the Activity Log displays entries for the current date. To view logs for a different day, use the date picker in the top-right corner to select your desired date.
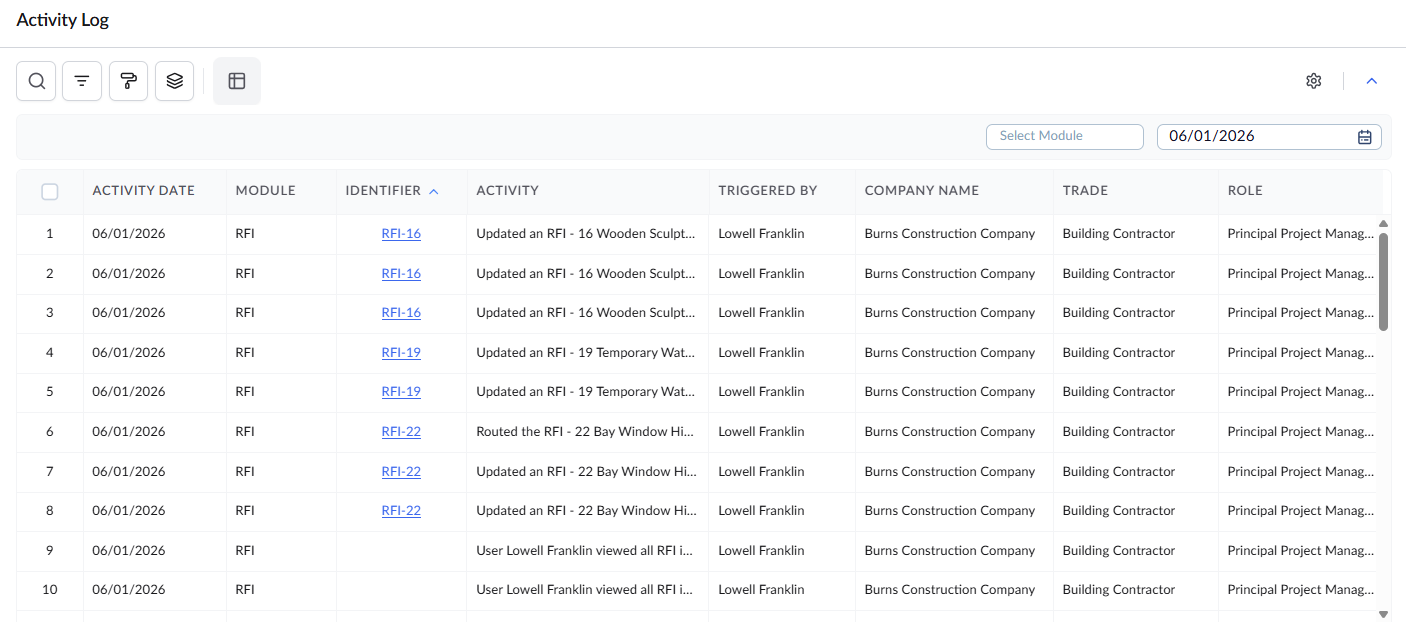
Activity Date – The date when the activity was logged.
Module – Indicates the project module where the activity occurred.
Identifier – The unique reference number assigned to the workflow item or project document for easy tracking.
Activity – Describes the specific action performed
Triggered By – The employee who initiated or carried out the activity.
Company Name – The name of the contractor, subcontractor, or organization the employee is associated with.
Trade – Specifies the category of work or discipline that the contractor company is responsible for.
Role – The job title, designation, or project role of the employee who performed the action.
Search, Filter, and Sorting Options
- Click the magnifier icon and use the 'Search' box located at the top left to find an entry using any value from the table as search criteria
- Click any column header to sort the rows in ascending or descending order based on that column's data.
- Click the cog wheel icon at the top right to adjust the display density and customize the display and order of the columns
- The options at the top left allow you to filter the entries, create nested groups of entries, highlight cells and manage personalized and customized views of the table. Use the links below to learn more:
Was this article helpful?
That’s Great!
Thank you for your feedback
Sorry! We couldn't be helpful
Thank you for your feedback
Feedback sent
We appreciate your effort and will try to fix the article