The multi-tiered location list for a project can be updated at any stage of its lifecycle, allowing you to add new locations as the project evolves and expands. The process is similar to adding a new locations list for the first time.
To add new locations to a project
- Ensure you are on the 'Location' screen within the 'Project Information' module of the project. If not:
- Click the main menu at the top-left
- Click 'Information' under 'Project' in the menu drop-down.
- The 'Project Information' screen opens by default.
- Select 'Location Tree' on the left.
- Click the main menu at the top-left
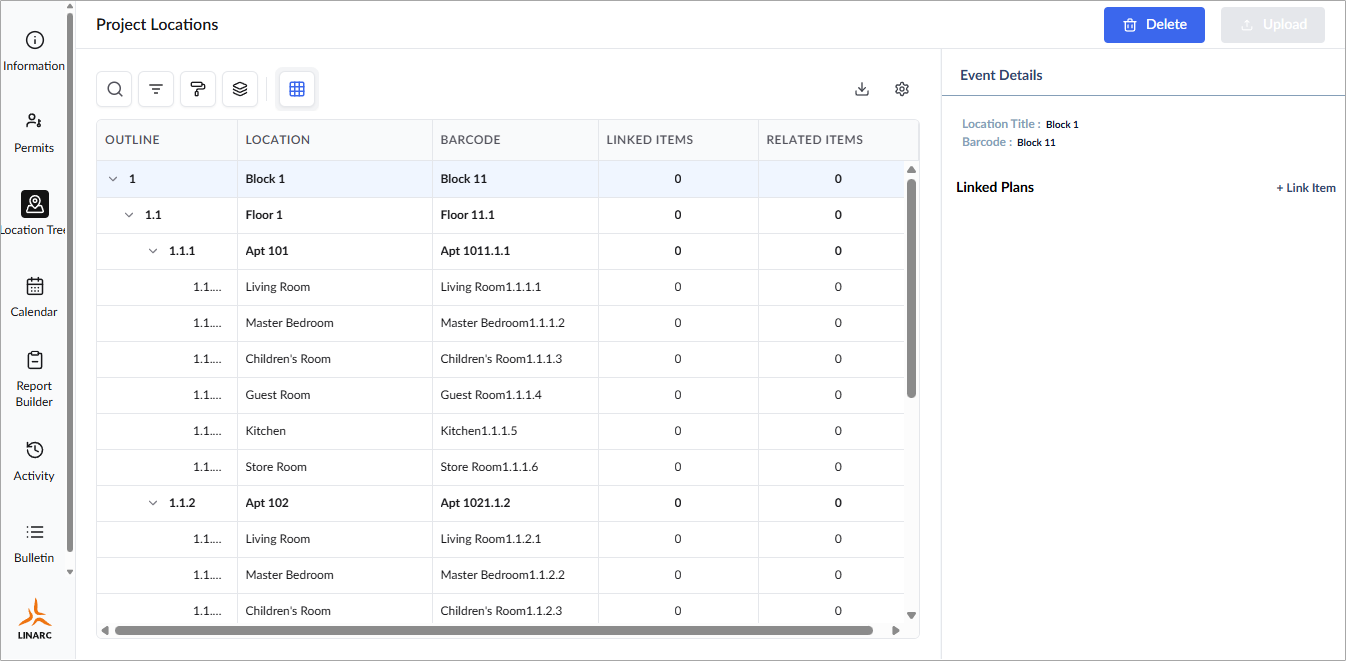
The existing locations are shown as a nested tree structure.
- Click 'Upload' at the top right to download the template file, create a new locations list and uplaod it to the project. See Add Multi-Tiered Locations to a Project for guidance on this.
- Once done, the new locations will be available for selection when creating document items like RFI, punchlist item, etc., along with the existing location entries.
Search, Filter, and Sorting Options
- Click the magnifier icon and use the 'Search' box located at the top left to find an entry using any value from the table as search criteria
- Click any column header to sort the rows in ascending or descending order based on that column's data.
- Click the cog wheel icon at the top right to adjust the display density and customize the display and order of the columns
- The options at the top left allow you to filter the entries, create nested groups of entries, highlight cells and manage personalized and customized views of the table. Use the links below to learn more:
Was this article helpful?
That’s Great!
Thank you for your feedback
Sorry! We couldn't be helpful
Thank you for your feedback
Feedback sent
We appreciate your effort and will try to fix the article